Configuration instructions for the EBOX TV 3.0
Initial configuration for EBOX TV 3.0 set-top box
Step 1 – Service activation
Activate your service by visiting the customer zone at client.ebox.ca.
Step 2 – Connecting the device
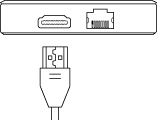
Plug one end of the HDMI cable into the EBOX TV set-top box, and the other end into an available HDMI port on your television.
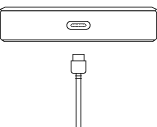
Plug the USB power cable into the power adapter, then plug the adapter into an electrical outlet. Connect the other end of the cable to the EBOX TV set-top box.
On your TV, select the correct source. Refer to your TV’s user guide if necessary.

Insert two AAA batteries into the remote control and follow the on-screen instructions.

Step 3 – Initial pairing of the Bluetooth remote control
- The initial system setup takes between 5 and 10 minutes.
- Make sure you can connect to the Internet.
- Having a Google account is recommended but not essential.
During your first connection, you will be prompted to sync the remote control via Bluetooth.
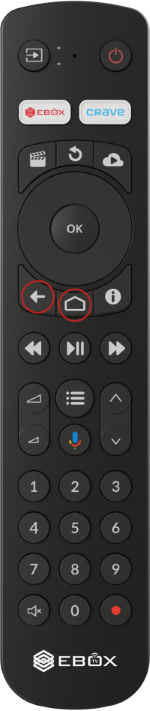
On the remote control, press and hold “Back” and “Home” buttons for 3 seconds.
Wait a few moments for the synchronization to complete.
Once pairing is complete, the remote control image on the screen will be highlighted in green, and the remote control’s indicator light will blink green.
If you encounter any issues, you can unpair the remote control and try again. See how to unpair the remote
Step 4 – System language selection
A prompt will appear asking you to select your preferred system language.

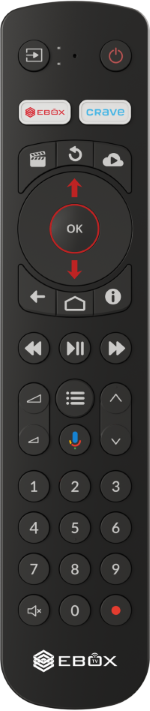
Select your preferred language using the “Up Arrow” and “Down Arrow” buttons. Confirm your selection by pressing “OK”.
Step 5 – Quick setup with Android phone (optional)
If you have an Android phone, you can follow the on-screen steps to simplify the configuration of your EBOX TV.
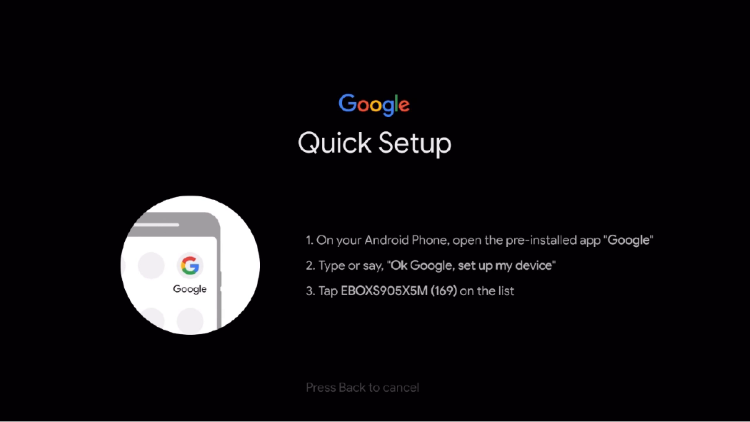
Once the setup is complete on your Android phone, you can proceed to step 7.
If the quick setup does not work, Press the “Back” button to cancel and proceed to the next step.
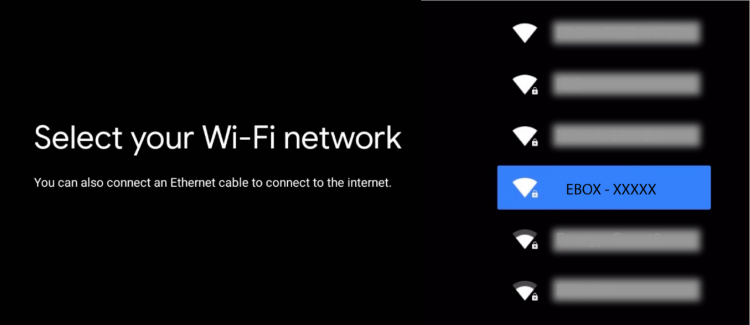
Step 6 – Connect to the Internet and a Google account
To connect to the Internet, you have three options:
- Câble Ethernet (fortement recommandé)
- Connexion Wi-Fi 5 GHz
- Connexion Wi-Fi 2.4 GHz
If you are not connected via Ethernet cable, you will need to select your Wi-Fi network from the list of available networks and enter the password to connect.
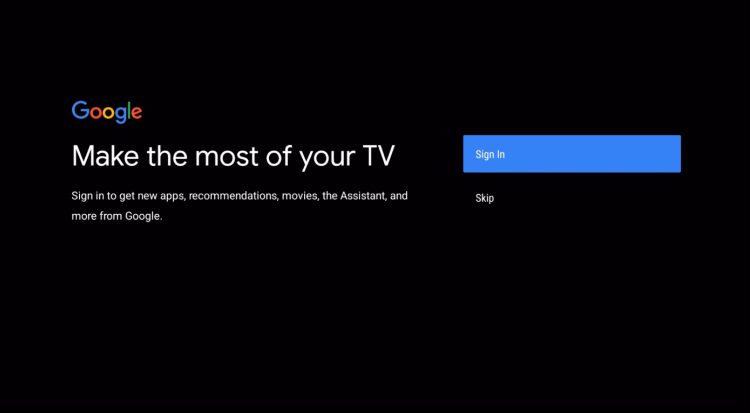
If you have not done so earlier, you will eventually be prompted to sign in to your Google account to access the Play Store and other Google services. This step is optional; you can still use the EBOX TV service without signing in. If you prefer to do it later, you can sign in anytime through the Android “Settings menu” under “Accounts and Profiles”.
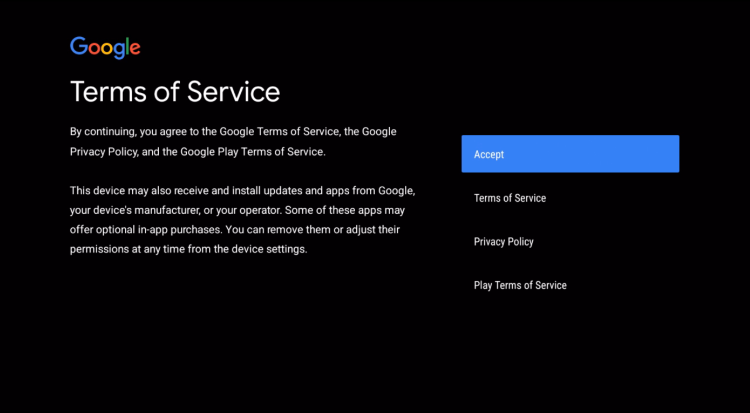
Step 7 – Terms of Service, Google Assistant and other features
To continue using the device, you’ll be prompted to read and accept Google’s Terms of Use. This step ensures access to Google services and features.
Once the Terms of Service are accepted, you will be able to choose which Google services to use, such as location services and automatic diagnostic data sharing with Google. These two options are not required for the proper functioning of EBOX TV and can be turned on or off later in the menus “Settings” – “Device Preferences” – “Usage & diagnostics”.
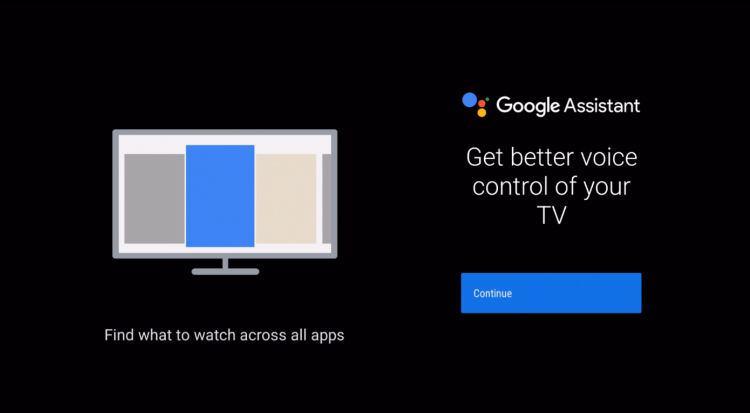
You can also choose to activate the Google assistant. This option is required if you want to activate the voice control with the remote. Google Assistant can be enabled or disabled at any time through “Settings” – “Device Preferences” – “Google Assistant”.
Google Assistant voice mode only works when you press the “Microphone” button.
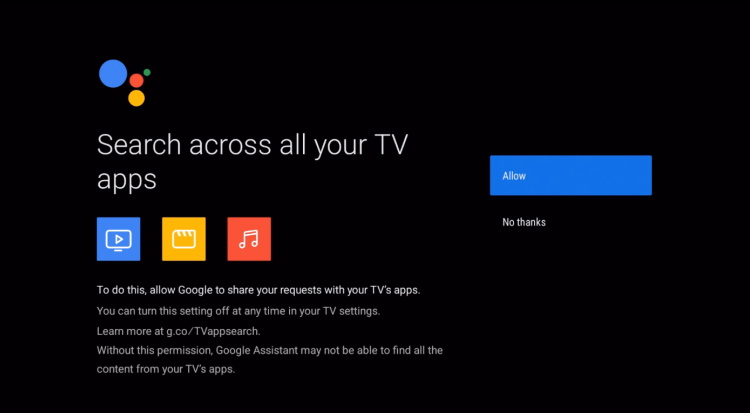
If you have selected the option to display more, you will be asked to allow Google to access other applications.
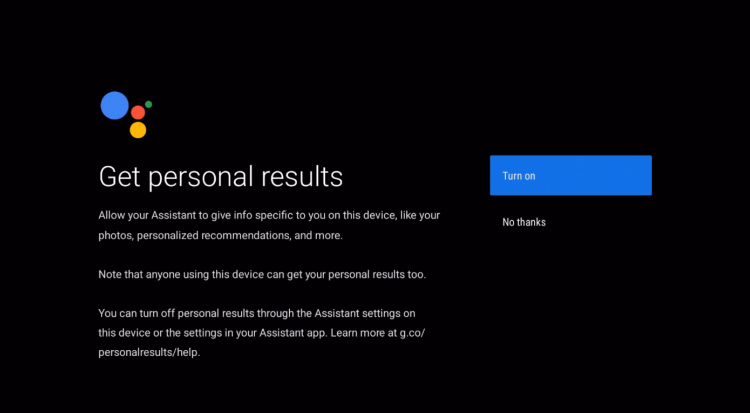
Once Google is granted permission, you will be asked if you would like to receive personalized results. This step is optional for the voice control function via the remote control.
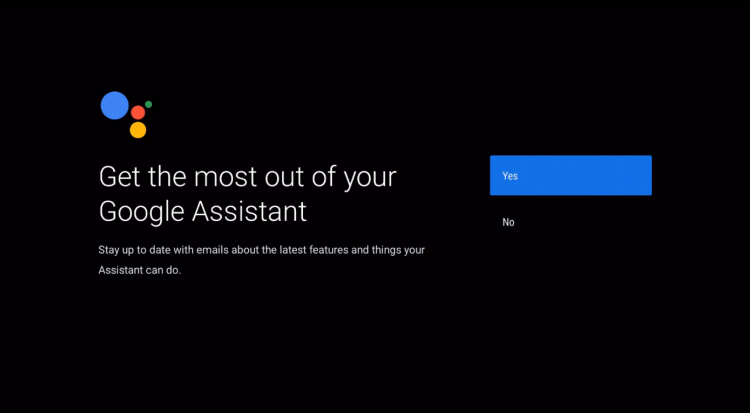
At this step, you may choose to subscribe to Google’s email newsletter about Google Assistant features. This is optional.
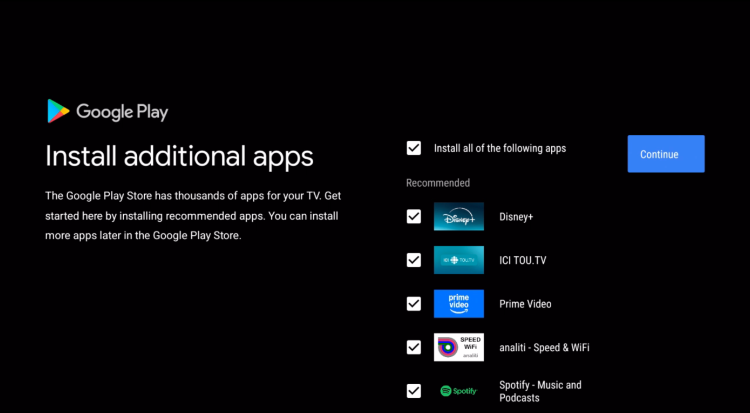
If you have linked your Google account and used apps on other devices, you will eventually be prompted to install additional apps from the Google Play Store.
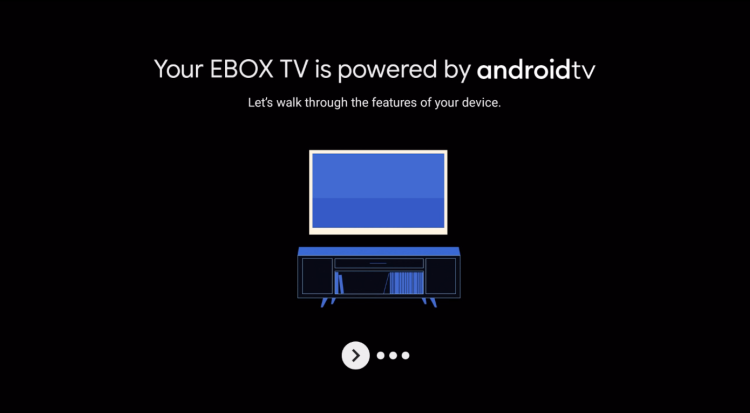
As the final step of the Android TV setup, you will be prompted to review the various features of your device. You can complete this step using the “right arrow” or “OK” button.
EBOX Internet you want it?
Sign up now